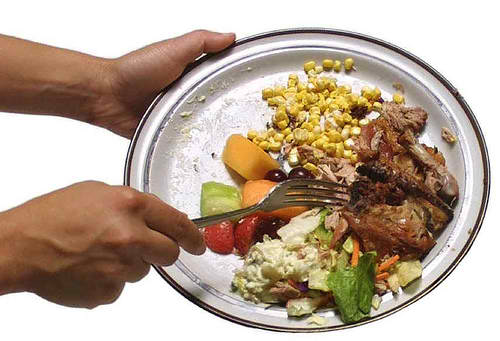
The United States is known for its low food prices that are paired with excessive amounts of food wasted. This is why you should read the solutions below before tossing your trash.
Trashcans, fridges, and garbage disposals are filled with crusts and bones, peels, forgotten and expired foods every day. There are some who have their compost pile at home while many do not which means more food are being disposed of daily. Try cutting down waste and get to save money with these yummy hacks to lower the waste from your kitchen.
1. Preserve the herbs.
If owning a herb garden that has everything in it including cilantro, dill, basil, and mint but find yourself struggling with limited space or that patio is way too shady or cramped for the plants, or if the herbs you’ve planted by your kitchen windowsill are all scraggly, you’ve probably opted for the next best thing and that is to buy from your local grocery. Unfortunately, you’ve bought more than is needed for the recipe you have in mind. So you forget them as they remain wrapped in a paper towel rotting slowly where they end up in the trash afterwards with you shaking your head for wasting your money again. This is sad actually since herbs can provide you with antioxidants, nutrients, and better flavors compared to the fat and salt in most dishes. The best way to use them is to freeze them!
For thyme, just wash it thoroughly and toss everything in a bag that is re-sealable and put in the fridge. This won’t freeze the herb but the droplets of water left can form something similar to snow. You can just peel the leaves when you need them.
For basil and parsley that have larger leaves, just remove the leaves from the stem and place them in ice cube trays. Fill the space halfway with herbs then cover them with olive oil before freezing. Aside from helping preserve the herbs, it can also help make the herbs ready to start your meals since you just toss them in a pan and use them as base for sautéed vegetables, tomato sauce, and chicken. Herbs that are delicate such as dill should be blanched first before freezing in oil. This helps in retaining its green color.
2. Save stale bread.
If you’re not overly fond of bread crusts don’t throw them away just yet or feed them to the geese and ducks at the park. Save these ends of stale bread in a reusable bag and pop it in the freezer. This comes in handy especially when the recipe calls for breadcrumbs. Just grab a few bread pieces from the bag and pulse in your food processor to get crumbs. Another quick way to get results is to spin them while still frozen. For crispier crumbs, first toast the bread before drying it out.
Larger pieces of bread are actually handy when making the base for homemade bread pudding like sourdough or challah. All you need to do is cut the bread into chunks and mix it with sugar, cream, eggs, vanilla, and milk just like when you’re making a sweeter style of French toast. Soak the bread for 30 minutes before pouring the entire mix into a baking dish with grease and put it in the oven at 350 degrees Fahrenheit until the center is firm and the surface is crisp. You can chocolate chips or cinnamon for added flavor.
If you have extra bagels instead of bread, you can still use them. Just slice them as thinly as you can, place them on a cookie sheet then drizzle with olive oil. Toast them until they turn brown and sprinkle some salt. You can also serve it with whipped cream cheese.
3. Use leftover produce for vegetable stock.
Whenever you prepare stews, soups, stir fries, salads, roasts, and even slow cooking meals, make sure that you save the skins, stems, and peels that you usually throw away. Place them in a big bowl and cover it with a plastic wrap or use a big resealable bag to keep the scraps to make a stock whenever you want.
The amount of stock that you can make depends on how much produce you get to save in your household. Instead of waiting to fill a big bowl with leftover veggies before making a stock, fill up a smaller bowl so the scraps won’t rot before being used.
Make sure that you remove any rubber bands, stickers, or even twist ties before tossing your vegetable scraps in the stockpot. All produce should be clean but the roots, skins, and stems are okay. Don’t include anything that you wouldn’t want to eat. If you don’t want a powerful flavor in your broth, don’t toss in beet scraps, mint, fennel or anything that has a strong flavor as this can stand out in your broth.
Fill the stockpot with water enough to cover the scraps then add a few pints. Keep in mind that too much water will make your stock weak. You don’t even need to season it since the flavor will be richer when the stock reduces. Bring the stockpot to a boil before simmering. Stir it occasionally and let it cook for 2 to 4 hours or until you get a tasty stock. You can also use a slow cooker for this. Start with high setting for half an hour to an hour before setting it to low and let the veggie scraps simmer for a few hours.
Put a strainer on another stockpot or a large bowl. You can use either a cone-shaped metal strainer or metal colander. Ask for help to avoid spilling while straining your hot stock.
You can ladle the veggie and liquid scrap mixture into the strainer until you are able to pour the contents yourself. Get additional bowl if you have created a lot of stock. Make sure that you press the vegetables firmly to squeeze out any stock that is remaining then throw away the pulp.
The best thing about making your own vegetable stock is that it has plenty of nutrients and can be used as base for sauces and soups. You can even drink it as is. Replace water with the stock when preparing grains or rice. Vegetable stock can last a long time in the freezer. Don’t forget to leave some space before placing the lid on the containers since the stock can expand once it cools.
4. Use leftover bones for broth.
Just like vegetable stock, broth made from bones is actually delicious and nutritious and can be served in many ways. Add fish heads and bones in a stockpot, add ample amount of water and bring it to a boil before letting it simmer for hours. Make sure that you strain the stock using cheesecloth to catch any food debris that you don’t want getting mixed with your stock.
After the yearly Thanksgiving dinner, strip the remaining meat from the bird for sandwiches then break the remains into smaller pieces. Throw them all into the stockpot and follow the steps mentioned above. The same can be done if you have leftover chicken bones. You can add a handful of herbs that you have left such as thyme, sage, parsley and rosemary when making stock. Just make sure that you strain the stock afterwards to get the stems, leaves, and bones. The chicken bones actually make the texture of the stock thicker and more nutritious.
You can also use beef bones especially marrowbones to make a stock. This is a bit complicated compared to chicken and fish stock since the larger bones need to be broken first before being simmered in water to get to the more nutritional and flavorful stuff. Marrowbones can greatly benefit from being roasted quickly in the oven prior to simmering as well as adding a bit of vinegar to the broth.
Regardless of what bone broth you are making, make sure that you remove the scum that forms on the top. Don’t wait until the broth is done before removing it as this will only make it fall back down the pot.
5. Save overripe bananas.
In its own way, bananas are actually the perfect food. It is sweet, soft, and contains high amounts of nutrients and potassium. You don’t even have to scrub or slice them unless of course you want to, and they’re just easy to peel and eat that even your toddle can master this art without too much fuss.
However, locating the perfect banana is another feat entirely. Bananas that are a bit under-ripe with a hint of green on the edges are starchier than sweet. Overripe bananas, on the other hand, can transform from speckled to unappealing fast. Finding the perfect banana which is at its peak flavor and texture requires skill.
Instead of throwing away bananas that are past their peak, just place them in one of your freezer bags. You only need 3 ripe bananas to create banana bread. You can keep some chocolate chips and walnuts too so you can make banana bread when you have enough bananas on hand. Defrost the bananas then remove the peels which are a bit slimy. This may look gross but the taste is absolutely delicious.
6. Use all the parts of your veggies.
The nose-to-tail trend has been around for years now but have you tried applying the same principle to your vegetables? You may not believe it but chefs have been using this technique not only with meat products but with produce too where they come up with inventive and creative uses for the less favored parts of vegetables and fruits. Among these are carrot and beet greens, radish, apple peels and cores, corn husks and silks.
Most vegetable parts that are often discarded are actually edible. They also have unique flavors and textures that can give your dish a different spin to them.
You can add radish and beet greens to your stir fry for additional flavor and color. Combine carrot tops with pepitas that are packed with nutrients to create pesto. You can also use corn silk and cornhusks to make the base for the broth corn risotto. For fruit cobblers and butters, you can use fruit cores and peels as well as pits and seeds. Leek greens are wonderful addition to your omelet by sautéing quickly.
Take a look at what you have rejected from your produce and see if you can make a broth out of them or use them individually with your prepared meals.
These are just a few ways that can help you minimize your kitchen waste and prepare a delightfully delicious meal.


